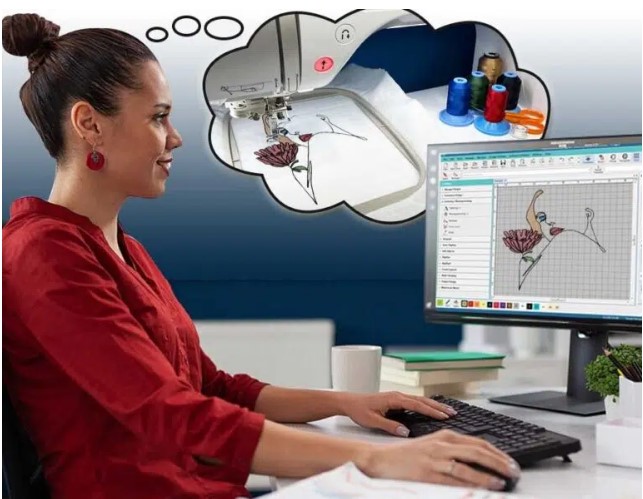
Thinking about turning your artwork into stitches? If you’re working with a Brother or Babylock embroidery machine, you’ll need your design in PES file format—that’s the language your machine understands. But if your design is in JPG, PNG, SVG, or any non-embroidery format, you’ll first need a PES converter to make that magic happen.
In this guide, we’ll break down what a PES file is, how to convert designs into PES format, and the tools and services that make it fast and easy—even if you have zero digitizing experience.
Quick Tip: Want it done professionally and quickly? Digitizing Buddy offers fast and affordable PES file conversion for any logo, artwork, or design. Whether it’s raster or vector, they’ll get it machine-ready with precision.
What Is a PES File?
A PES file (short for “PULSE Embroidery Stitch”) is a type of embroidery file specifically used by Brother and Babylock embroidery machines. It contains stitch information that guides the machine where to place each thread, how long the stitches should be, and in what order to apply colors.
Unlike image files (like JPGs or PNGs), PES files are not visual files. They’re technical and machine-readable—and that’s why you can’t simply rename a .jpg to .pes and expect it to work.
Common File Types You Might Start With
Before converting a design to PES, you’ll usually start with one of these file types:
| File Type | Description | Embroidery-Ready? |
| JPG / PNG | Raster image formats | ❌ No |
| SVG / AI / EPS | Vector design formats | ❌ No |
| Sometimes used for artwork | ❌ No | |
| PES | Embroidery file format | ✅ Yes |
So, how do you get from a flat image (like a logo in JPG) to a file full of stitch data (like PES)? You digitize it.
What Is a PES Converter?
A PES converter is a tool (or service) that transforms a standard image or vector file into a machine-readable PES embroidery file.
But here’s the important part:
It’s not a simple drag-and-drop conversion. PES files require embroidery-specific instructions—like stitch paths, density, underlay, and trims. That’s why converting artwork into PES format is better handled by digitizing software or professionals.
PES Conversion Options: DIY vs Professional
There are two ways to get a PES file from your design:
1. Use Digitizing Software
These tools let you manually create or convert designs into PES format.
Popular PES Conversion Software:
| Software | Cost | Skill Level | PES Export |
| Wilcom Hatch | Paid | Intermediate–Pro | ✅ |
| Embrilliance Essentials | Paid | Beginner–Pro | ✅ |
| Ink/Stitch (Free) | Free | Intermediate | ✅ |
| SewArt | Paid | Beginner–Intermediate | ✅ |
| PE-Design (Brother) | Paid | Intermediate | ✅ |
These programs let you import raster/vector art, define stitch types, set color stops, and export as PES.
2. Use a Professional PES Conversion Service
If you’re not ready to dive into the software world, the fastest and safest option is to hire a digitizing service.
Why Use a Professional PES Converter?
- Better stitch quality
- Manual adjustments for optimal results
- Thread color matching
- Guaranteed machine compatibility
- Free edits or revisions if needed
Digitizing Buddy is a top choice for custom PES file conversion. They’ll take your image (JPG, PNG, PDF, SVG, etc.) and manually digitize it into a clean, ready-to-stitch PES file. Turnaround is usually within 4–12 hours.
What Happens During the PES Conversion Process?
Whether you use software or a pro, the goal is the same: convert a visual design into stitch data.
Here’s what happens in the process:
- Artwork is imported into digitizing software
- Objects and shapes are traced and separated
- Stitch types are applied (e.g., satin, fill, running stitch)
- Stitch density and angles are adjusted
- Color stops are defined for thread changes
- File is saved/exported as PES
The result? A file your Brother or Babylock machine can read and embroider.
Will Any Design Work as a PES File?
Not always. Some designs need tweaks before they’re stitch-friendly.
Common Issues That Need Fixing Before Conversion:
- Too many small details → May not translate well into stitches
- Low-resolution JPGs → Hard to trace and digitize cleanly
- Gradient or photographic designs → Need simplification
- Too many color changes → Can slow down production
That’s where professional services shine—they clean up, simplify, and prep your artwork for real-world stitching.
How to Use a PES File with Your Embroidery Machine
Once you have your PES file, using it is straightforward:
- Transfer the file to a USB drive or SD card
- Insert into your Brother or Babylock machine
- Select the file from your machine’s screen
- Load thread colors and hoop fabric
- Press start and stitch away!
Can I Learn to Convert to PES Myself?
Yes, absolutely! If you’re into embroidery long-term or want to sell custom designs, learning to digitize and convert to PES is a valuable skill.
Beginner Tips:
- Start with free software like Ink/Stitch or demo versions of Hatch
- Practice on simple designs (like icons or logos with 1–2 colors)
- Learn about stitch types and density settings
- Watch tutorials on YouTube or take online courses
But for production-ready designs (especially logos), use a pro—especially if you’re on a deadline or selling to clients.
Where to Get PES Files Online
If you’re not creating your own, there are plenty of marketplaces that sell ready-made PES designs:
- Etsy – Great for niche and trendy embroidery patterns
- Creative Fabrica – Offers bundles and commercial licenses
- EmbroideryDesigns.com – Filter by PES and design category
- Digitizing Buddy – Custom logo to PES conversion service
Quick Summary: PES File Conversion Essentials
| Need | Solution |
| Convert JPG to PES | Use digitizing software or a pro |
| Fast, reliable PES conversion | Digitizing Buddy |
| DIY PES file creation | Hatch, Embrilliance, Ink/Stitch |
| No time or experience? | Hire a service for best results |
| Machine-ready for Brother/Babylock | PES file format |
Final Thoughts
Converting a design into a PES file isn’t just about changing the file extension—it’s about transforming your art into stitches that flow beautifully on fabric.
Whether you’re making custom t-shirts, hats, or embroidery patches, having a high-quality PES file ensures your final product looks sharp and professional.